Monday, February 13, 2012

Soft Pretzels

Last weekend we didn't watch the Superbowl, but did see this recipe on one of the food blogs we read, and decided that Soft Pretzel making would be a fun weekend project. They were actually a lot easier than I thought they would be, and really tasty too! The only thing you need to do is plan a few hours ahead, as there's a lot of waiting both for the dough to rise and for them to bake.

Otherwise, here are the ingredients and our step by step photos!

Soft Pretzels

1 tablespoon sugar
1 1/2 cups lukewarm water
1 (1/4-oz) package active dry yeast (2 1/2 teaspoons)
3-3/4 to 4 cups all-purpose flour
1 large egg
1 heaping Tablespoon baking soda 

   
Start by adding the sugar to the warm water. Stir it up so that it dissolves. Add in the yeast and let it sit for 5-10 minutes until it looks frothy kind of like this. Next add the flour and knead it until it's a nice dough consistency. It should still be a bit sticky so don't add too much extra flour

Next let it rise covered for 45 minutes to an hour. 
  
Next comes the messy part. Flour your hands and then punch down the dough and divide into 8 evenly sized pieces.

Then roll each piece into long thin strands. 

Then do your best to form them into pretzel shapes!
It took us quite a few tries and we had some very bizarre looking ones. 

Some are better than others, but they all tasted the same, so don't worry about it!

Next you boil a big pot of water. Once it is boiling add a big tablespoon of Baking Soda.
It does something to the dough so they brown more apparently. 

Throw in your pretzels a few at a time and cook for about 3 minutes flipping them over halfway through so both sides get done. 

They look kind of weird at this point as you can see. 
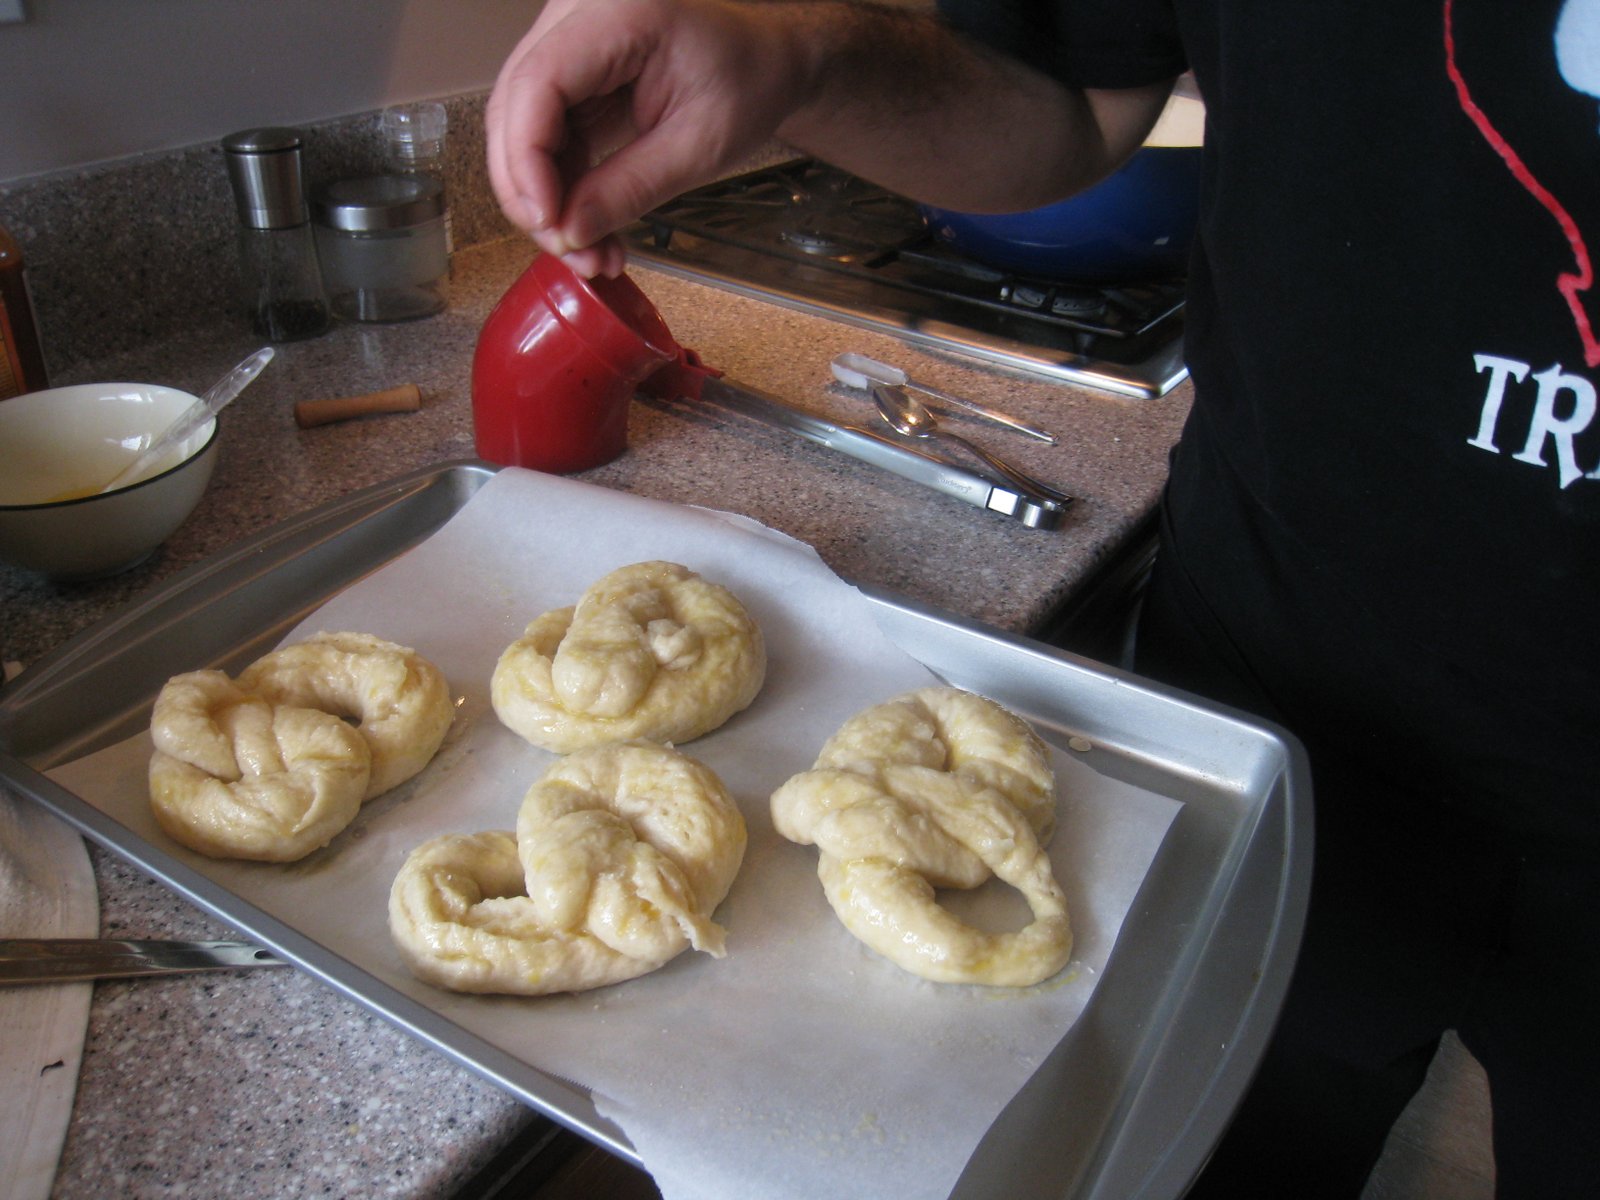
Next brush them all over with an eggwash and sprinkle with coarse salt - or whatever other seasonings you want. We wanted to go traditional on our first run.

After 35 minutes in the oven at 425 degrees they'll brown up nicely and be crunchy on the outside but soft on the inside. And pretty darn tasty too! 

Saturday, January 28, 2012

Cranberry Chocolate Tart

Back at Thanksgiving, I promised a follow up post wherein we detailed the awesome Cranberry Chocolate Tart recipe we found. It takes a bit of pre-planning, but was so light and had just the right amount of sweetness, that it's totally worth the effort. Even after our Thanksgiving meal, everyone managed at least a piece! The original recipe is from Bon Appetit Magazine, but we found it on Epicurious.

http://www.epicurious.com/recipes/food/views/Cranberry-Chocolate-Tart-240427

Here's what you need, and some step by step photos so you can make your own! It seems a bit complicated, but all the individual parts only take a few minutes, you just have to alot for all the chilling time.
There are three components to this dessert: The Crust, The Cranberry, The Filling.

Crust:
1 1/4 cups chocolate wafer cookie crumbs
1/4 cup sugar
1/8 teaspoon salt
5 to 6 tablespoons unsalted butter, melted

     
Preheat the oven to 350. Then pulverize your chocolate graham crackers in the food processor or with a bag and a hammer, or however you so choose to make them crumby. Mix the sugar and salt in with the crumbs. Melt the butter and then pour in of the crumbs and mix it all up until its like that great sand castle sand texture. Then get your trusty springform cake pan, line it with parchment paper if you want to make your life easier, and then pack in the crumb mixture at the bottom. Try and get it flatish on top if you can. A spoon helps with this. Then throw it (gently) into the middle of the oven and bake it for about 15 minutes. You can do this the day before or the day you're making the rest, but make sure it's not still hot when you put the filling on or it will melt!
Cranberry Topping:
1/2 cup cranberry juice, divided
1 teaspoon unflavored gelatin
1 12-ounce bag fresh or frozen cranberries
3/4 cup sugar
2 teaspoons fresh lemon juice
1 teaspoon finely grated lemon peel
1 teaspoon grated peeled fresh ginger
Pinch of salt
4 tablespoons finely chopped crystallized ginger


Put the gelatin in 1/4 cup of your cranberry juice. 
Let it sit there until it gets jellyish. (not jellyfish)
     

Then in a pot, put the rest of the cranberry juice, the cranberries, the sugar, lemon juice, grated ginger and salt and boil it up! 

    
Make sure you stir it so that the sugar will dissolve into the liquid. Then let it simmer for about 5 or so minutes, until the cranberries are soft and plump. 


Strain the berries from the juice and add the gelatin to the juice. Stir away until the gelatin mixture dissolves. Then you can put the cranberries back in. Oh and add the chopped up candied ginger, it makes a huge difference! 


Then let it chill until it gets jello-y at least 8 hours, but you can do it up to 2 days ahead if you're feeling extra on the ball. 

Mascarpone Filling:
1 8-ounce container mascarpone cheese
  • 1/2 cup icing sugar
  • 1/2 cup chilled whipping cream
  • 1 teaspoon vanilla extract
  • Thin strips of crystallized ginger (optional garnish)

  
Mix the marscarpone, icing sugar, whipping cream and vanilla with a mixer of some sort. Just get it thick enough to spread - apparently you can over mix it. You can make this part a day ahead too if you want. 

The Assembly:

Now you have your 3 parts, plus some extra candied ginger.
Guess what comes next?!


Layer them up! Crust, then filling, then cranberries on top! Sprinkle with the ginger if you want it extra gingery. The make sure to put it back in the fridge for a few hours so that it's easy to serve and looks awesomely impressive after dinner.


Remove it from the spring for pan and cut it up into tasty slices!


Enjoy!

Monday, January 16, 2012

In which Kim Came to Visit... And We Ate!

Right before the we went home for the holidays, we had a last minute visit from Kim! We had a really fun 3 days hanging out and exploring San Francisco. Apparently all the photos we took involved food of some sort, so I thought it would be fitting to share some of them here!


The night Kim arrived we took her to Crawdaddy's - the classiest place in town! You get bibs and your food comes in plastic bags!! This doesn't mean it isn't delicious!! We were taking so many photos and having so much fun, the owner brought us a live crawfish to become friends with.

      
The view from the San Francisco Farmer's Market where we went the next day and wandered and tasted many delicious things. 

Such as this awesome breakfast sandwich from 4505 meats
(the butcher Jerome took the sausage class from)

Tasty Korean tacos

Oh so succulent Sauerkraut 

We then walked an hour to the other side of the city where we stopped at Toronado which has an insane beer list, to rest up a bit before dinner. 
    
We then stopped at a little gastropub called Magnolia, where we had some oysters and a salami plate.

And finally we ended up at Alembic which we just happened upon, and was really great. They had delicious house cocktails, 

Pork belly burgers, 

Duck hearts with pickled pineapple,

and Bone Marrow with Garlic Confit! 

And somehow we still had room for tasty desserts!

All and all a fun and filling weekend! If you're in San Francisco, we'd heartily recommend all these places!