Saturday, June 16, 2012

Maple Sandwich Cookies

For the past few Canada Days and a few instances in between, I've taken to making these Maple Sandwich cookies. Last year I had to make two batches in two weeks so that everyone that was asking for some could get some. They're a bit time consuming and require planning ahead, but are definitely worth it! They're from the Complete Canadian Living Baking Book, but here's the basic rundown.

For the dough:
1 cup softened butter
1 cup firmly packed brown sugar
1/4 cup maple sugar 
1 egg
1 tsp maple extract
3-1/4 cups all purpose flour
1/2 tsp baking powder
1/2 tsp salt

For the Filling:
1/4 cup softened butter
2 cups icing sugar
2 tbsp whipping cream
2 tsp maple extract

You will need the dough to chill for at least an hour, before you roll and cut out and bake. You can make the dough itself up to a day ahead though. Just make sure you have an hour or so the next day to do the rolling and cutting and baking. 

Beat the softened butter with the brown sugar. I use our stand mixer for this, it saves on the elbow grease. Stop when it gets fluffy. Add in the 1/4 cup Maple Syrup - preferable the really good Canadian stuff! I've gotten a can in my Christmas stocking the past few years to ensure I have a stock for these cookies! Also add the egg and the maple extract. This is a bit tricky to find, but look near the vanilla in the grocery store. I've actually only found "Maple Flavouring" but I assume its the same. Beat all of those together. 

Mix together the flour, baking powder and the salt and add to the rest of the ingredients in 2 steps to make it easier. It'll make a nice smooth dough. Split it in two and flatten it if possible - this makes the rolling easier. Wrap it up in ceran wrap and chill for at least an hour - up to a day. 

Preheat your oven to 350 degrees and line some baking sheets with parchment paper. then start rolling out the dough. The recipe suggests to roll it between wax paper - this sort of helps, but is a bit of a pain, especially as the dough will be tough since it's cold. Don't worry this is the hardest part, just bear with it, and use those muscles!! Roll about 1/8-1/4" thick, and cut with a cookie cutter - maple leaves are very fitting, but they theoretically taste the same even if they are just circles. Keep rolling the scraps until you make as many cookies as you can. You can score the leaves with a knife to emulate the veins (not shown in this batch). Place on the baking sheet and bake spread out in the oven for 10-12 minutes - until golden brown like in the picture above. Transfer to racks to cool. 
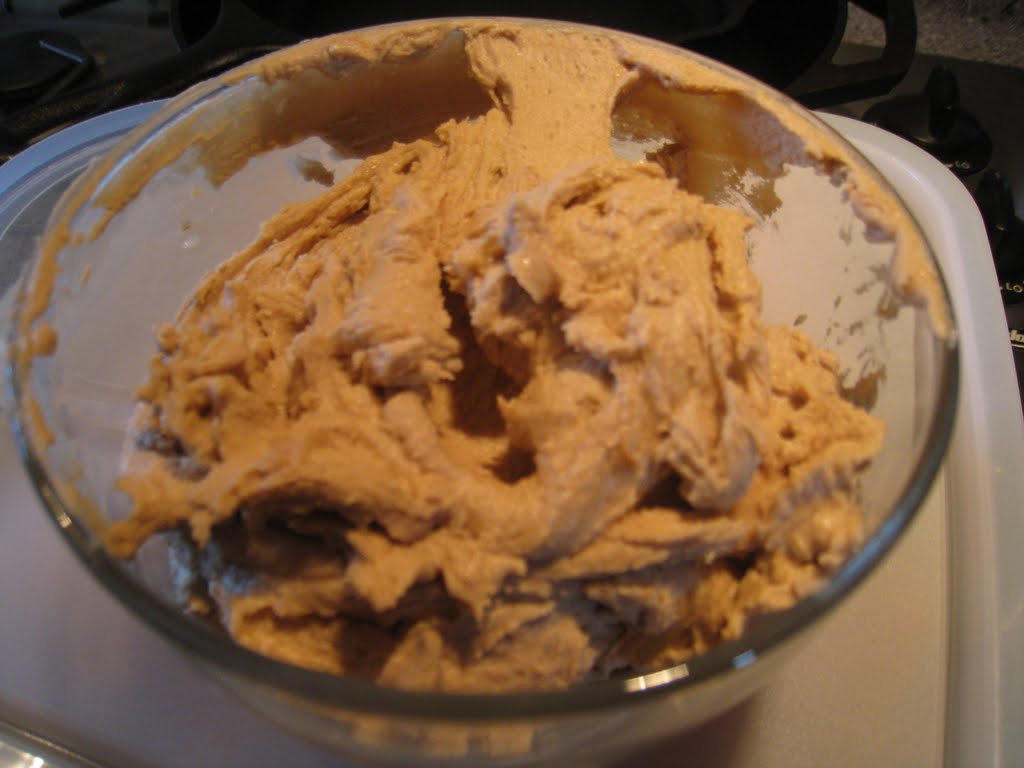
At some point either when you're waiting for the dough to chill, or the cookies to bake, you can make the icing. Beat the butter and then add in the icing sugar, cream and maple extract. Beat until its smooth and fluffy. The 1tbsp of whipping cream is a pain, but I haven't tested to see what would be different without it yet. 

Next comes the fun part - making the sandwiches! Spread some of the icing between two cookies - about 1 tsp maybe a bit more. Try and get it spread around so you have a good cookie to icing ratio. The cookie cutter I've used in the past is pretty big. I usually only get about 25 very filling sandwiches, so if you want them to go father you might want to get a smaller cookie cutter. I got one this winter, so I'll try it out for this summer's batch. And I posted this a few weeks early so you'd have plenty of time to make a batch for Canada Day!! 


Friday, June 1, 2012

Pizza Nights!

This recipe makes great pizza dough and is super easy! I've made it both by hand kneading and with our stand mixer, and its worth it either way (albeit faster with the mixer)! The original recipe is from Crazy Plates by Janet & Greta Podleski but we've done some tweaking over the years. It's one of our favourites, and though it requires a little bit of pre-planning it gives a lot of options. The recipes are collected from many of our pizza nights, hence them magically going from only a bit whole wheat to totally and back again!

You'll need:
2 1/4 tsp active dry yeast (aka 1 package if you roll that way)
1 cup warm water
1 tbsp honey - I just estimate since its too messy to measure
1 tsp salt
2-2.5 cups flour
(minimum 1/2 cup whole wheat, but we've done it
almost all whole wheat - just add some extra water)
1 1/2 tbsp olive oil - again I just estimate to save on dishes!


Start by mixing the honey into the warm water, and then put the yeast in and let it sit for a few minutes to get frothy - like in the handy dandy picture! Then add the salt and olive oil.


Next add 1/2 cup of whole wheat flour and of the regular flour, and start mixing.
Add another cup of flour and keep mixing - that's usually enough for us. But, use some more if it's too sticky. Then knead it until its smooth and elastic-y.


Spray the bowl with some non stick spray and cover it and leave it alone somewhere warm and non-breezy for at least an hour. I try and make the dough in the morning before work, so it's ready for us when we get home.


Later on it should look like this!!


The cool thing about this recipe, is that it can make 2 thinner crust pizzas, or 1 thicker crust pizzas, depending on what you feel like, or how many toppings you have on hand. Preheat the oven to 450 degrees. Punch the dough down and form your pizzas and put them on sprayed pans. Add your toppings. And bake for 10-15 minutes depending on your oven, rotating them if you have two.

Here are some of the combos we've done recently:

Pasta sauce, cheddar cheese, jalepenos, tomatoes.
Buffalo sauce, bacon, green peppers, jalepenos, cheddar, cilantro 

Pesto sauce, chicken, caramelized onions and feta

Pasta sauce, mushrooms, tomatoes, cheddar salami

Some other things we've tried: Bbq sauce, salsa as sauce, taco meat, chorizo, capers, fresh mozerella and even making our own stuffed crust! Let us know what you try out! 

Saturday, May 12, 2012

Mapo Tofu and Beef and Broccoli

Last year we decided to try and perfect a recipe each so that we'd have an easy go to dinner when we needed one. We decided on Mapo Tofu and Beef and Broccoli. We each researched some recipes and drew from our experience eating the dishes. We made it every few weeks for a couple months in order to try out new ideas and get it pretty set in our memories. The two recipes are a nice compliment to each other, and they take about the same amount of time to make, so with each of us making one it works out well. It's a bit hard to take pictures while its all happening so fast, but I think there's enough to get the idea.

Note: All our measurements are very loose, but I tried to guesstimate to give a starting point. If you don't have some of the stuff, thats okay, feel free to add, subtract, replace etc.

MaPo Topu
1 lb container Tofu
2-3 tbsp black bean in garlic sauce
2 tbsp soy sauce
1-2 tbsp grated ginger
1 tsp sesame oil
2 tbsp sambal oelek (spicy)
2 cloves garlic minced
1/4 cup chicken broth
1 tbsp corn starch
optional 1/4 lb ground pork

Beef and Broccoli

1/2 lb flank steak cut thinly
2 bunches of fresh broccoli
1 tbsp soy sauce
1 tbsp black bean in garlic sauce
2 tbsp sambal oelek (spicy)
2-3 tbsp grated ginger
2 cloves garlic
1 tbsp hoisin sauce
1 tbsp oyster sauce
1 tsp sesame oil

Mapo Tofu: 
Drain and cube the tofu. Add the corn starch to the chicken broth in a small bowl. For the chicken broth I just use the powder and mix it with water in the ratio the package says. Mix it up well and set aside. Add all of the rest of the sauce ingredients to the tofu and stir together (see photo above). If you using the ground pork - I only do if we happen to have some - cook in pan until its done and then pour the soy sauce on it. Then add the tofu to the pan (with the pork if using) cook until it warms all the way through 3-5 minutes probably. Then add the broth and cornstarch mixture. Boil until the sauce gets nice and thick.

Beef and Broccoli:
Cut the beef thinly. It's easier to do if it is a tiny bit frozen. Sometimes when we get a big piece from the store, we'll pre-slice it and freeze it in the right portions, which makes it easier later. Add all of the sauce mixture to the beef and let it sit for a minute while you deal with the broccoli. Cut up the broccoli - we like to have more broccoli than beef. Cut it into bit size pieces and then cook it for a few minutes in a non stick pan with some water to steam it a bit. We usually do this for about 5 minutes so that there's still some crunch in the broccoli. I don't have a picture of this part. Remove the broccoli and set aside for a minute.  Next cook the beef in the same pan you cooked the broccoli in. (see photo above) 

Once the beef is cooked through, add the broccoli back in and stir it around for a minute or so to soak up the extra sauce. 

We tend to make jasmine rice with it, and by starting it at the beginning, it usually works out that everything is done about the same time. It makes a very tasty and rounded dinner, that only takes about 20 minutes, which is great for work nights. Let us know if you give it a try, we'd love to hear what you do differently and what you think of it!